How to Flash Metal Roof J Channel Like a Pro: Step-by-Step Guide for Perfect Results
A metal roof is a significant investment, prized for its durability, longevity, and modern aesthetic. However, even the most robust metal roof can fail if its critical components, particularly the flashing, are not installed with meticulous care. Among these components, the J-channel plays a vital role in defining the edges and transitions of your roof system, offering a clean finish while, more importantly, acting as a crucial line of defense against water intrusion.
Flashing a metal roof’s J-channel like a professional isn’t just about aesthetics; it’s about safeguarding your home from costly water damage, preventing leaks, and ensuring the structural integrity and extended lifespan of your entire roofing system. A "pro" approach means understanding the nuances of water flow, material compatibility, and precision application. This comprehensive guide will walk you through every step, equipping you with the knowledge and techniques to achieve perfect, leak-proof results.
Understanding the J-Channel and Its Role in Metal Roofing
The J-channel, aptly named for its J-like profile, is a type of metal trim used extensively in metal roofing and siding applications. Its primary function is twofold:
- Aesthetic Finish: It provides a neat, finished edge where metal panels terminate against a wall, fascia, or other structural elements, concealing cut edges and fasteners.
- Water Management: More critically, the J-channel works in conjunction with other flashing components to direct water away from vulnerable areas, preventing it from seeping behind panels and into the roof structure. It essentially creates a protective gutter or shield along edges and transitions.
Common applications for J-channel in metal roofing include:
- Gable Ends: Finishing the roof panels along the rake (sloping edge).
- Eaves: Sometimes used in conjunction with drip edge for a clean finish.
- Wall Transitions: Where a metal roof meets a vertical wall, such as a dormer or an adjoining structure.
- Around Penetrations: Though specialized flashing is often used, J-channel can sometimes be integrated around skylights or vents to provide a clean edge for other flashing components.
The importance of proper J-channel flashing cannot be overstated. Any compromise in its installation—a gap, an unsealed seam, or incorrect overlap—becomes an open invitation for water, leading to rot, mold, and damage to the sheathing, insulation, and interior finishes of your home.
Essential Tools and Materials for a Professional Job
Achieving professional results requires the right tools and materials. Skimping here can lead to frustrating reworks and potential leaks down the line.
Tools:
- Tin Snips: Left-cut, right-cut, and straight-cut snips are essential for precise, clean cuts on metal.
- Utility Knife: For cutting underlayment, sealants, and other non-metal materials.
- Caulk Gun: A high-quality, comfortable caulk gun for consistent sealant application.
- Tape Measure: For accurate measurements.
- Chalk Line: To ensure straight lines for cutting and placement.
- Drill/Driver: With appropriate bits for fasteners.
- Pop Rivet Gun (Optional): If using pop rivets for specific connections.
- Crimpers (Optional): For manipulating metal edges.
- Gloves: For protection against sharp metal edges and sealants.
- Safety Glasses: Non-negotiable for eye protection.
- Marking Pencil/Scribe: For precise marking on metal.
- Deburring Tool/File: To smooth rough edges after cutting.
Materials:
- J-Channel: Ensure it matches your roof panel material (steel, aluminum) and color. Always order slightly more than your measurements to account for cuts and overlaps.
- High-Quality Sealant/Caulk: A premium, exterior-grade, UV-resistant, flexible sealant (e.g., urethane-based, polysulfone, or specialized metal roofing sealant). Color-matched sealant can enhance aesthetics.
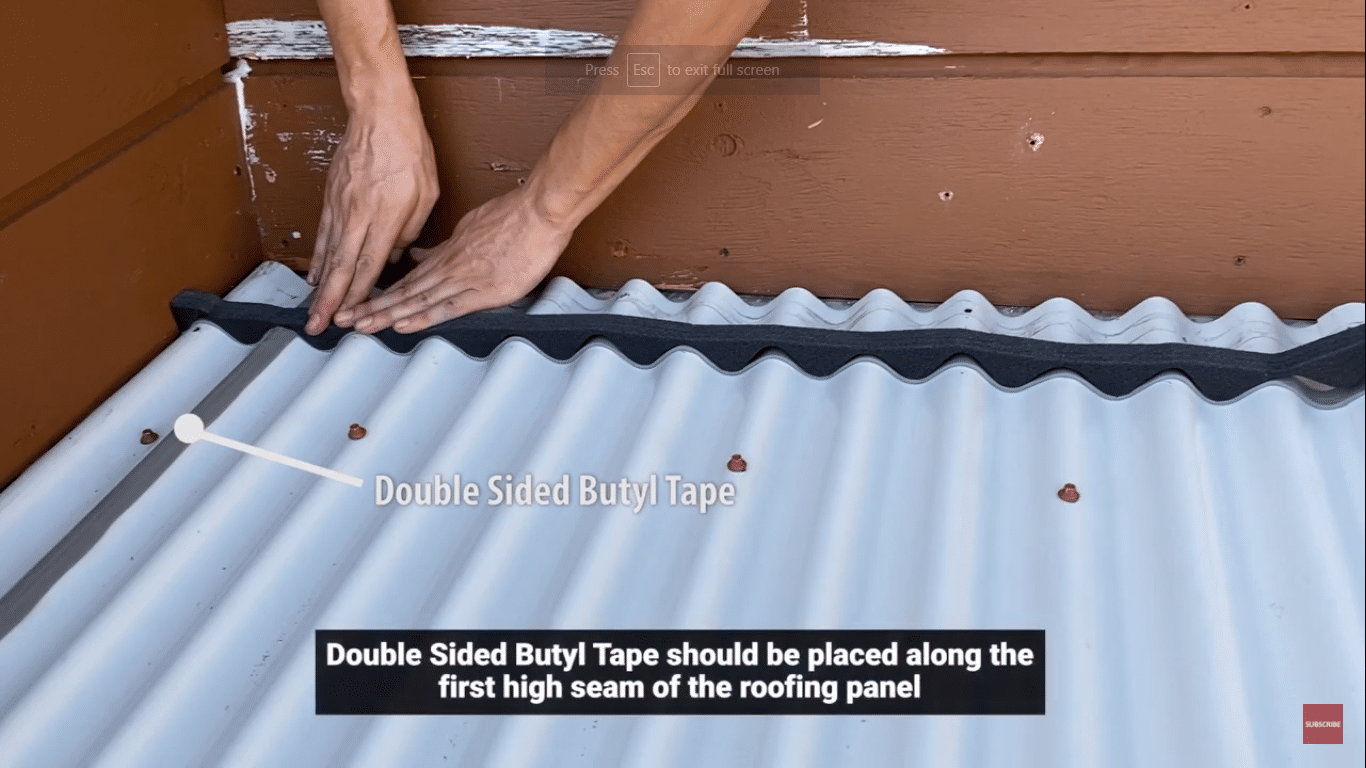
- Butyl Tape: A non-curing, self-adhering sealant tape often used between overlapping metal components for an extra layer of waterproofing.
- Flashing Membrane (Self-Adhering): A peel-and-stick, self-adhering asphalt or rubberized membrane for critical areas, providing a robust waterproof barrier beneath the J-channel, especially at wall transitions.
- Fasteners: Self-tapping screws with neoprene washers (to create a watertight seal) are standard. Ensure they are compatible with your metal type to prevent galvanic corrosion. Pop rivets can be used for securing J-channel overlaps or connections where screws aren’t feasible.
- Denatured Alcohol or Acetone: For cleaning surfaces before sealant application to ensure optimal adhesion.
Pre-Installation Preparation: The Foundation of Success
A professional installation is built on thorough preparation. Don’t rush this phase.
- Surface Cleaning: All surfaces where the J-channel will be installed, and where sealants will be applied, must be immaculately clean, dry, and free of dust, grease, oil, or debris. Use denatured alcohol or acetone for cleaning metal surfaces, allowing them to fully dry. Adhesion of sealants is directly proportional to surface cleanliness.
- Accurate Measurements and Cuts:
- Measure each section precisely, accounting for overlaps and corner details.
- Mark your cuts clearly with a pencil or scribe.
- Use the appropriate tin snips for straight, left, or right cuts. Make smooth, deliberate cuts to avoid jagged edges that can compromise sealing or pose a safety hazard.
- For corners, precise notching and bending are required to create a tight, seamless fit. Practice on scrap pieces if you’re new to metal fabrication.
- Planning Overlaps and Water Flow: Always install J-channel in a way that sheds water, following the direction of the roof’s slope. Overlaps should be shingled, meaning the upper piece overlaps the lower piece, preventing water from being driven underneath by gravity or wind. Typically, overlaps should be at least 2-4 inches.
- Safety First: Working on a roof can be dangerous. Always use a stable ladder, wear fall protection if working at heights, and protect your hands with gloves and eyes with safety glasses. Ensure you have a clear, stable work area.
Step-by-Step Flashing Process
This guide focuses on a common scenario: flashing J-channel where a metal roof meets a vertical wall. The principles, however, apply to other J-channel applications.
Step 1: Install Underlayment and Base Flashing
Before any metal is installed, ensure your roof deck has a high-quality underlayment. At wall transitions, apply a self-adhering flashing membrane (peel-and-stick) directly to the roof deck and extend it up the vertical wall by at least 6-8 inches. This creates a critical primary waterproof barrier beneath where the J-channel will sit. Smooth it out thoroughly to remove air bubbles.
Step 2: Position the J-Channel
- Carefully align the J-channel along the wall-to-roof intersection or the edge where it will be installed.
- Ensure the "J" shape is oriented correctly to receive the metal roof panels or to provide the desired finished edge. The lower lip of the J-channel should be slightly above the flat surface of the roof deck to allow water to flow freely over the roof panels, not into the channel itself.
- Use a chalk line to mark the exact position for straight installation.
Step 3: Secure the J-Channel
- Once positioned, temporarily hold the J-channel in place.
- Apply a continuous bead of high-quality sealant along the back flange of the J-channel where it will meet the wall or fascia before permanently fastening. This is a critical hidden seal.
- Secure the J-channel using self-tapping screws with neoprene washers, spaced every 12-18 inches. Drive screws straight and snug, but do not over-tighten, which can deform the metal or crush the washer, compromising the seal.
- At overlaps, ensure the sealant is applied between the overlapping pieces before fastening them together, often with a pop rivet or a short screw.
Step 4: Seal All Seams and Penetrations – The Pro’s Touch
This is where attention to detail separates a good job from a professional one.
- Behind the J-Channel: As mentioned in Step 3, sealant applied behind the J-channel where it meets the vertical surface is paramount. This prevents water from wicking behind the channel.
- Overlaps: Apply a generous bead of sealant between all J-channel overlaps (where one piece meets another along its length). Smooth the sealant for a clean finish.
- Corner Details: Corners are notorious leak points. Carefully cut, notch, and bend the J-channel to create a tight, shingled fit. Apply ample sealant at all corner seams, ensuring complete coverage. A small piece of butyl tape can also be inserted into corner joints for added protection before sealing.
- Fastener Heads: After securing, apply a small dab of sealant over each screw head, especially if the washer doesn’t completely cover the hole or if you want an extra layer of protection.
- Edge Sealing: Where the J-channel meets other flashing components or the roof panels, ensure there’s a continuous, smooth bead of sealant, allowing for movement but preventing water ingress.
Step 5: Integrate with Roof Panels
- Once the J-channel is flashed, install your metal roof panels.
- The cut edge of the metal roof panel will typically slide into the receiving channel of the J-channel. Ensure there is adequate space for thermal expansion and contraction of the panels within the J-channel, usually about 1/4" to 1/2" of play.
- The J-channel should never restrict the movement of the roof panels.
Step 6: Final Inspection
- After all J-channel and roof panels are installed, conduct a thorough visual inspection.
- Check every seam, every overlap, and every fastener for proper sealant application and tight connections. Look for any gaps, voids, or areas where sealant might have been missed.
- If possible, inspect during or after a rain shower to identify any potential leaks. Address any deficiencies immediately.
Advanced Techniques and Professional Tips
- Creating Drip Edges: In some applications, especially at eaves or transitions, you might need to create a small hem or bend in the J-channel’s lower lip to form a more pronounced drip edge, ensuring water sheds cleanly away from the structure.
- Thermal Expansion: Metal expands and contracts significantly with temperature changes. When fastening J-channel, especially long runs, avoid over-tightening and consider using slotted holes at intervals to allow for slight movement without stressing the material.
- Color-Matched Sealants: For a truly professional finish, invest in sealants that match the color of your metal roofing and J-channel. This creates a seamless, aesthetically pleasing look.
- Tool Maintenance: Keep your tin snips sharp and clean. Clean your caulk gun after each use to prevent sealant from hardening inside.
- Practice on Scrap: If you’re new to working with metal, practice making cuts, bends, and corner details on scrap pieces of J-channel before working on the actual installation.
Common Challenges and How to Overcome Them
- Leaks: The most common challenge.
- Solution: Re-evaluate all sealed areas. Look for pinholes in sealant, areas where sealant was insufficient, or overlaps that are installed against the water flow. Pay extra attention to corners and transitions.
- Misalignment: J-channel installed crookedly.
- Solution: Use a chalk line religiously. Measure multiple points along the run before fastening. Don’t rely solely on eyesight.
- Damaged J-Channel: Bends, dents, or scratches during handling or installation.
- Solution: Handle metal components with extreme care. Lay them on soft surfaces. If damage occurs, replace the piece. Minor scratches can sometimes be touched up with color-matched paint, but deep scratches compromise the protective coating.
- Working on Slopes/Heights: Safety concerns.
- Solution: Always prioritize safety. Use proper fall protection equipment, stable ladders, and anti-slip footwear. Work with a partner whenever possible.
- Sealant Curing Issues: Sealant not adhering or curing properly.
- Solution: Ensure surfaces are perfectly clean and dry before application. Check the sealant’s expiration date and manufacturer’s recommended application temperature range.
Conclusion
Flashing metal roof J-channel like a pro is a task that demands precision, patience, and a deep understanding of water management. It’s not just about attaching a piece of metal; it’s about creating an impenetrable barrier that protects your home for decades. By carefully selecting the right tools and materials, meticulously preparing your surfaces, and following each step of the installation process with professional-level attention to detail, you can achieve perfect, leak-proof results.
The effort invested in proper J-channel flashing pays dividends in the form of a durable, beautiful, and long-lasting metal roof, free from the worries of water damage. Embrace the "pro" mindset, and you’ll not only secure your roof but also enhance the overall value and integrity of your home.
Estimated Price Table for J-Channel Flashing Components
Please note: These are estimated prices and can vary significantly based on location, brand, material type (steel vs. aluminum), gauge, color, market fluctuations, and supplier. Always obtain multiple quotes for current pricing.
| Component/Service | Unit of Measure | Estimated Price Range (USD) | Notes
